
Static SSL site hosting with S3 and CloudFront
Hosting your own website with S3 is really pretty easy with a few caveats:
1. You need to name the S3 bucket the same as your DNS name eg: allthethin.gs
2. You need to configure your bucket policy for web hosting and enable web hosting on the bucket
3. You need to point your DNS to the S3 bucket
S3... it's not just for breakfast object storage anymore.
This will get you going for your basic HTTP hosted site. These days basic HTTP hosting isn't probably going to be good enough and the trend is to start phasing out HTTP in favor of HTTPS sites. (security.googleblog.com: moving towards a more secure web)
AWS CloudFront will solve that for you and as an added bonus, you get a global Content Distribution Network to accelerate your site.
How does this change things?
1. You can name your S3 bucket whatever you want
2. You need to configure the CloudFront distribution so that it will accept requests for your DNS name
3. Caching can really mess you up if you are not paying attention
4. Propagation of CloudFront distribution changes are not instantly available accross the globe, get a cup of coffee.. and maybe some pie.
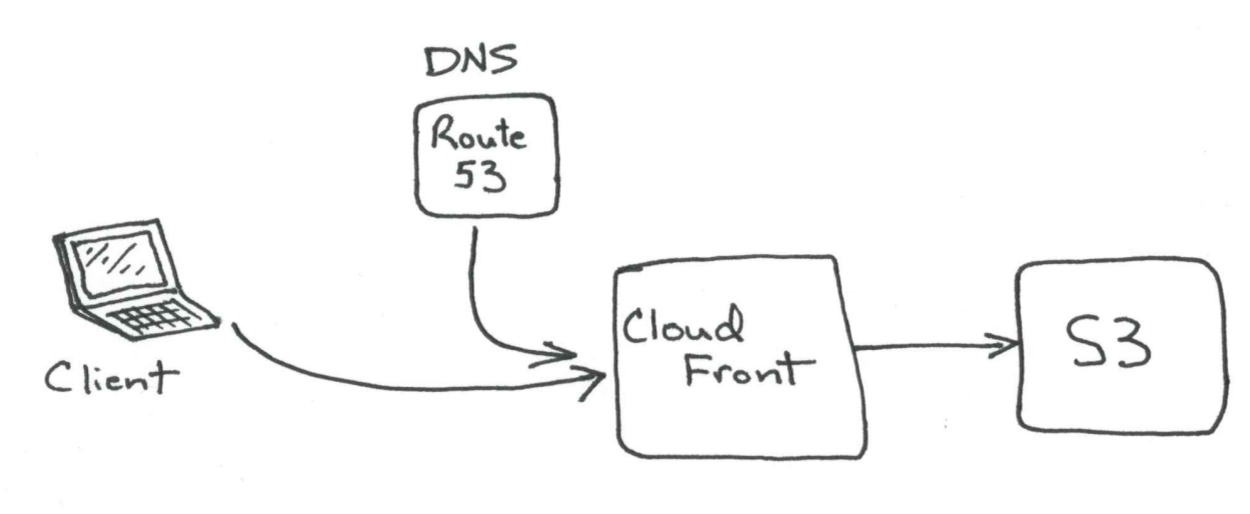
Global Content Distribution Network terminating SSL for your S3 hosted serverless website
Okay let's get down to business...
Step 1 - Create an S3 bucket for your site content and configure it for web hosting
Select S3 from the AWS services and choose "Create Bucket"
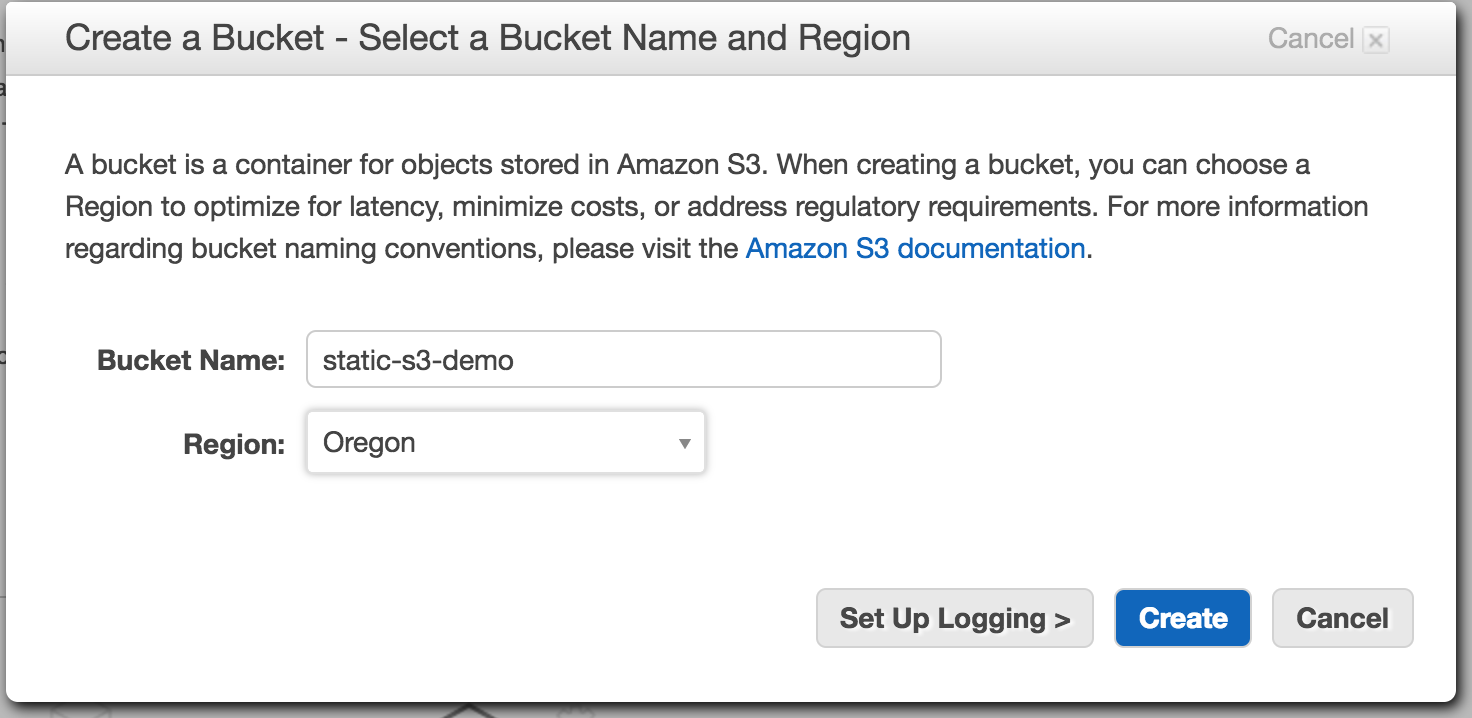
(your bucket name doesn't matter too much for a CloudFront enabled site)
Then under properties for the bucket, select the "Static Website Hosting" option and select "Enable website hosting."
Here you should also set your default HTML document and a document to display when you have a missing item or 404.
Here i selected index.html for my default HTML document and error.html for my error page. Also note the URL it lists next to the word "Endpoint". This is the AWS url you can use to reference this web hosting S3 bucket directly. But note it's only HTTP... not HTTPS. If you named your bucket to match your DNS name exactly and pointed your DNS to the name you see here you would be done for an HTTP only site. But we aren't going to do the bare minimum here, so keep reading...
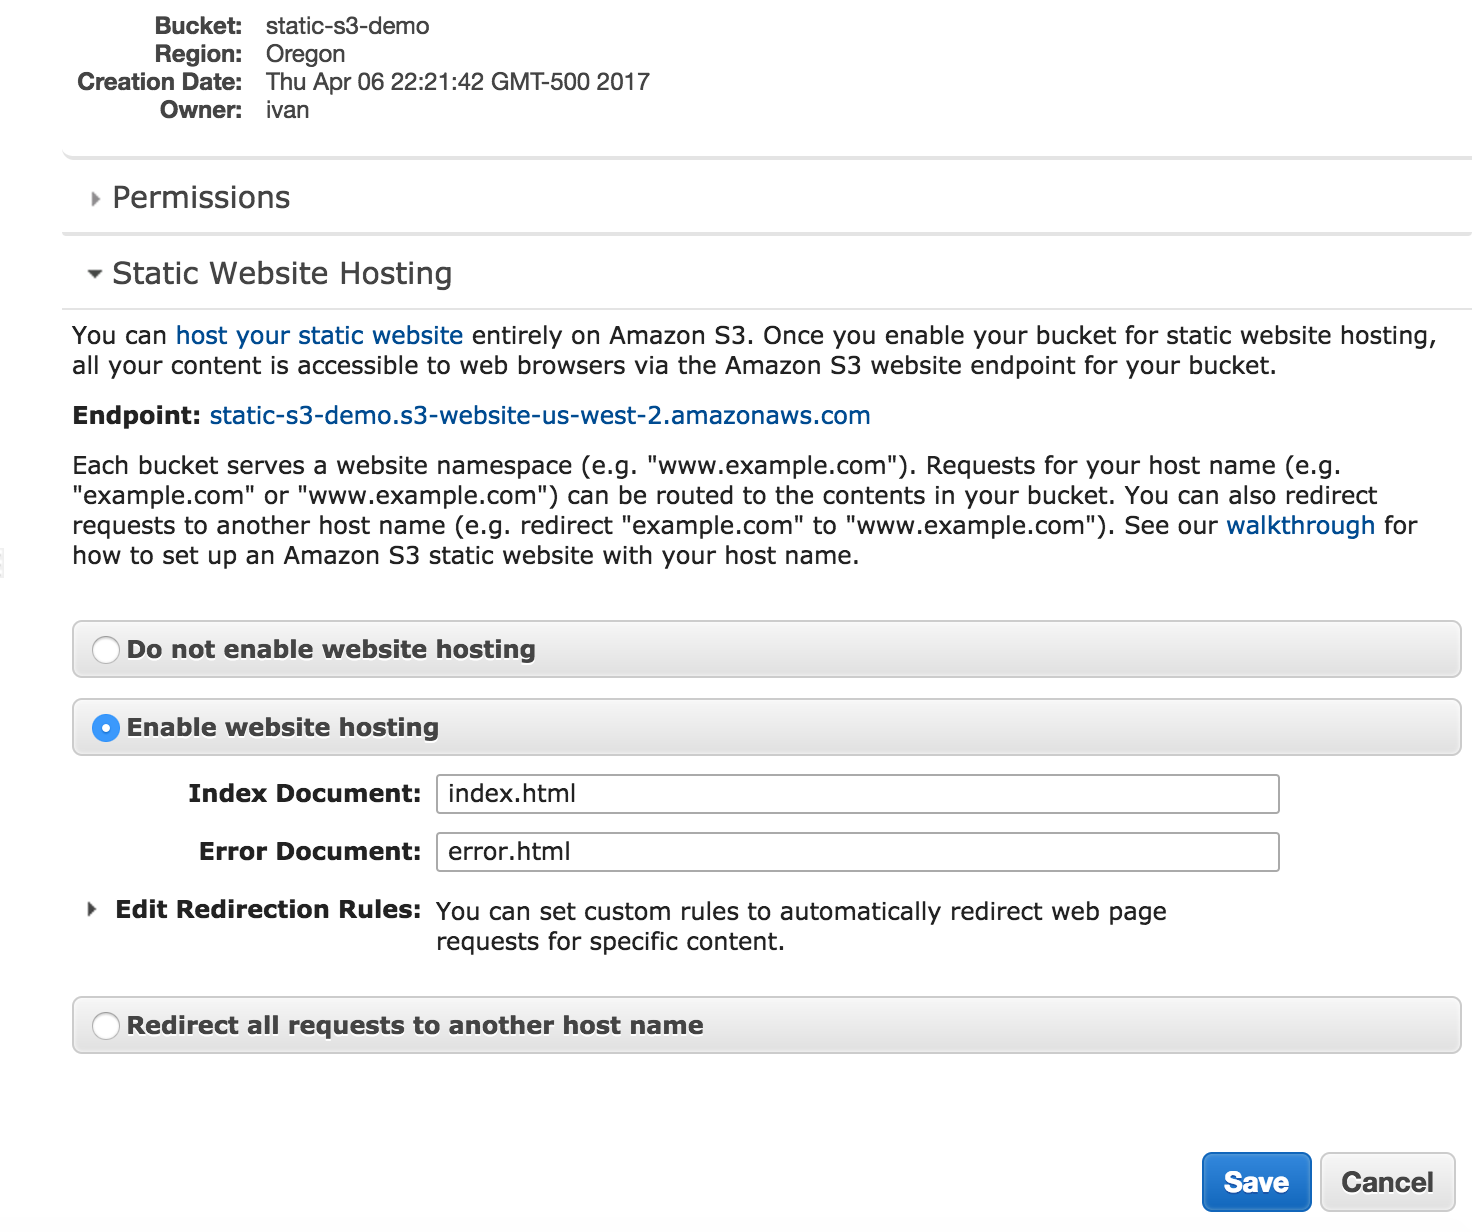
(choose your index & error documents)
Next we'll create a couple of really basic HTML files to host out of our static website.
You can create these with whatever text editor you would like, make sure to save them with .html extensions.
<html>
<head>
	<title>Hello blog readers!</title>
</head>
<body bgcolor='#fff'>

	<h1>Hello blog readers!</h1>

</body>
</html>
(index.html)
<html>
<head>
	<title>Hello blog readers!</title>
</head>
<body style="background-color: #fff; color: #f00;">

	<h1>404</h1>
	<h2>Woops! Can't find that</h2>

</body>
</html>
(error.html)
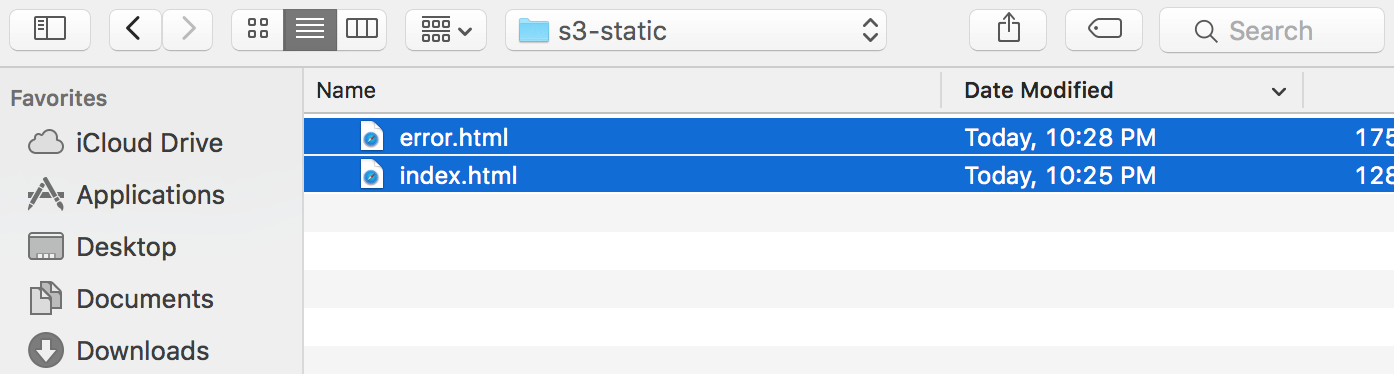
Next we want to upload these files to the S3 bucket we just created...
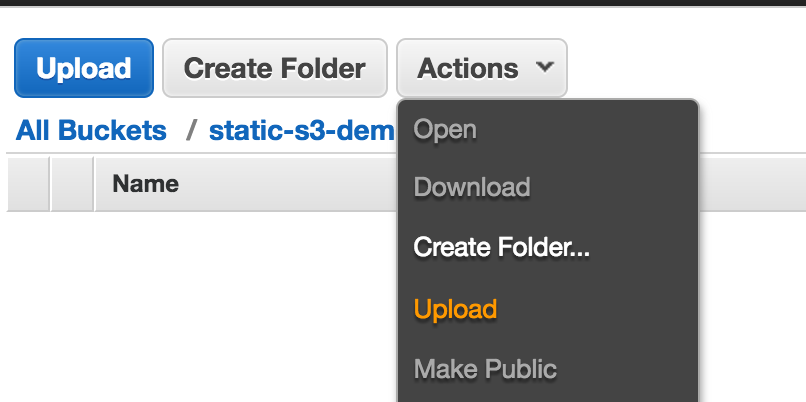
and add the files
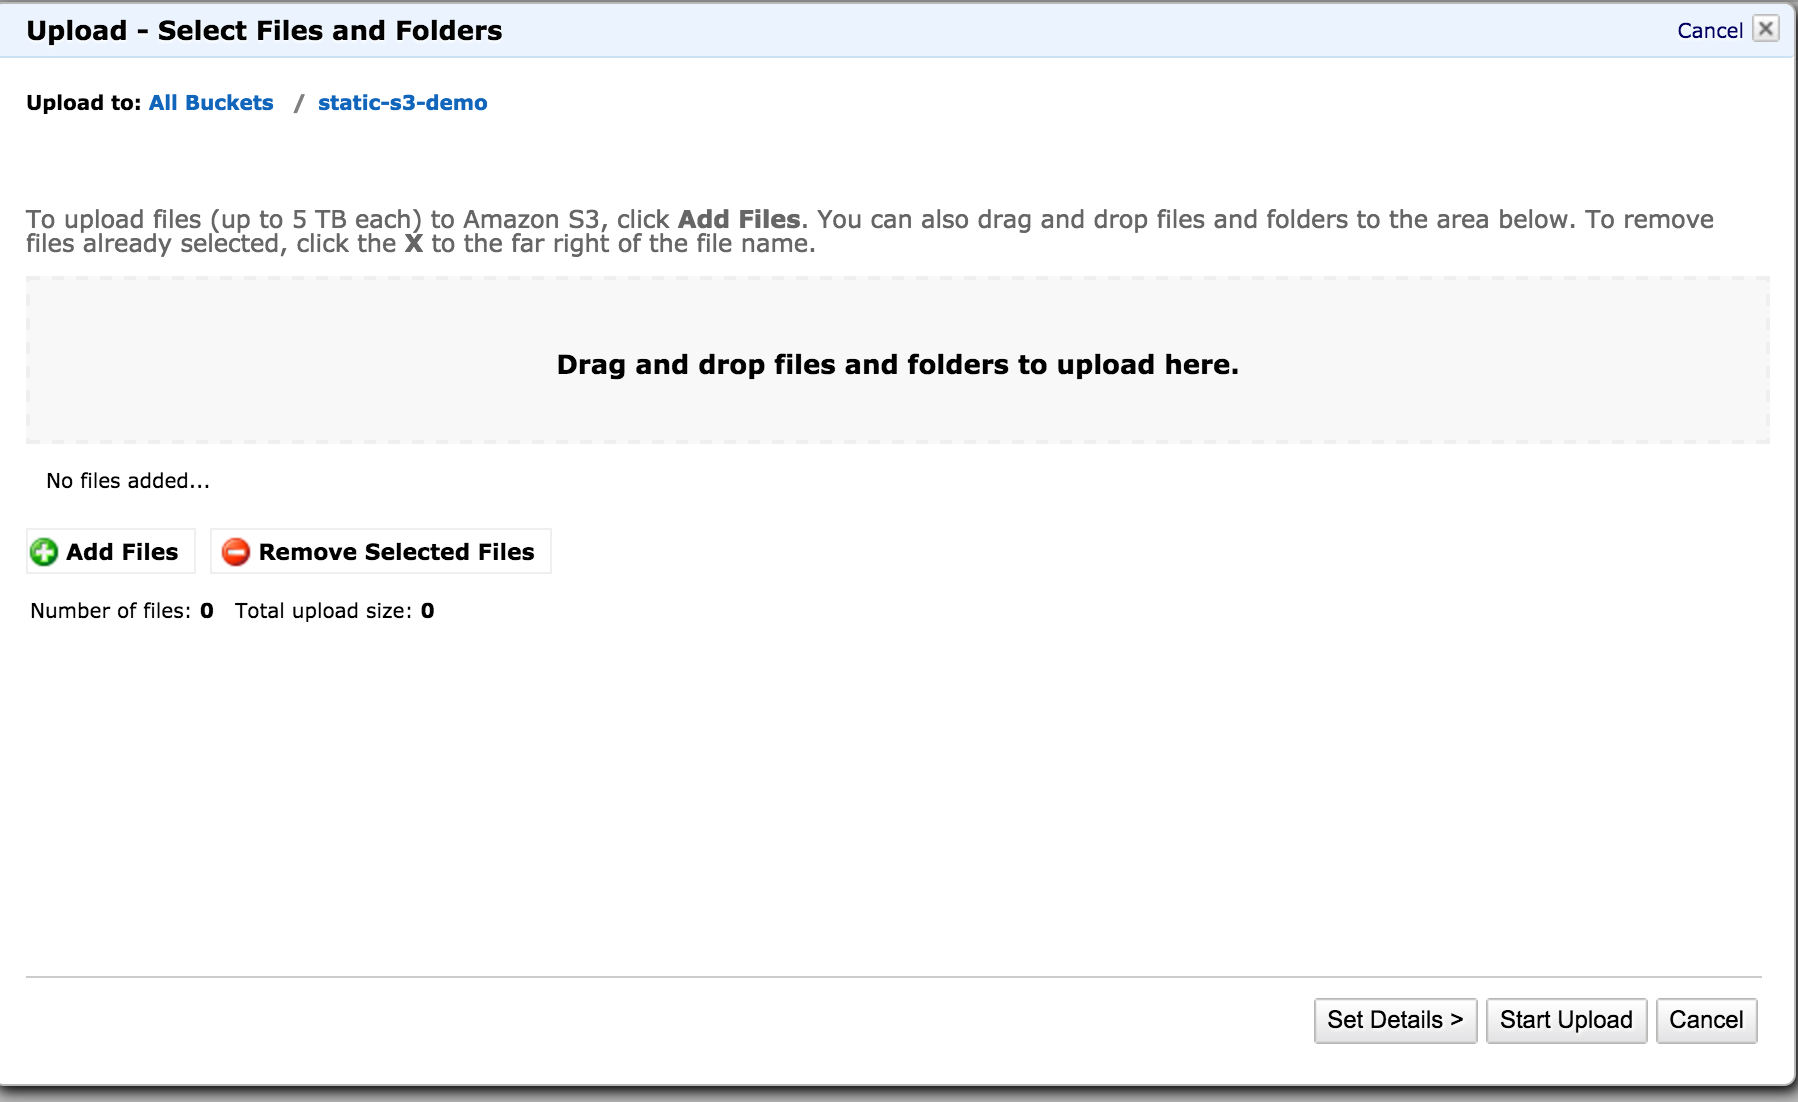
Don't hit upload yet!!!
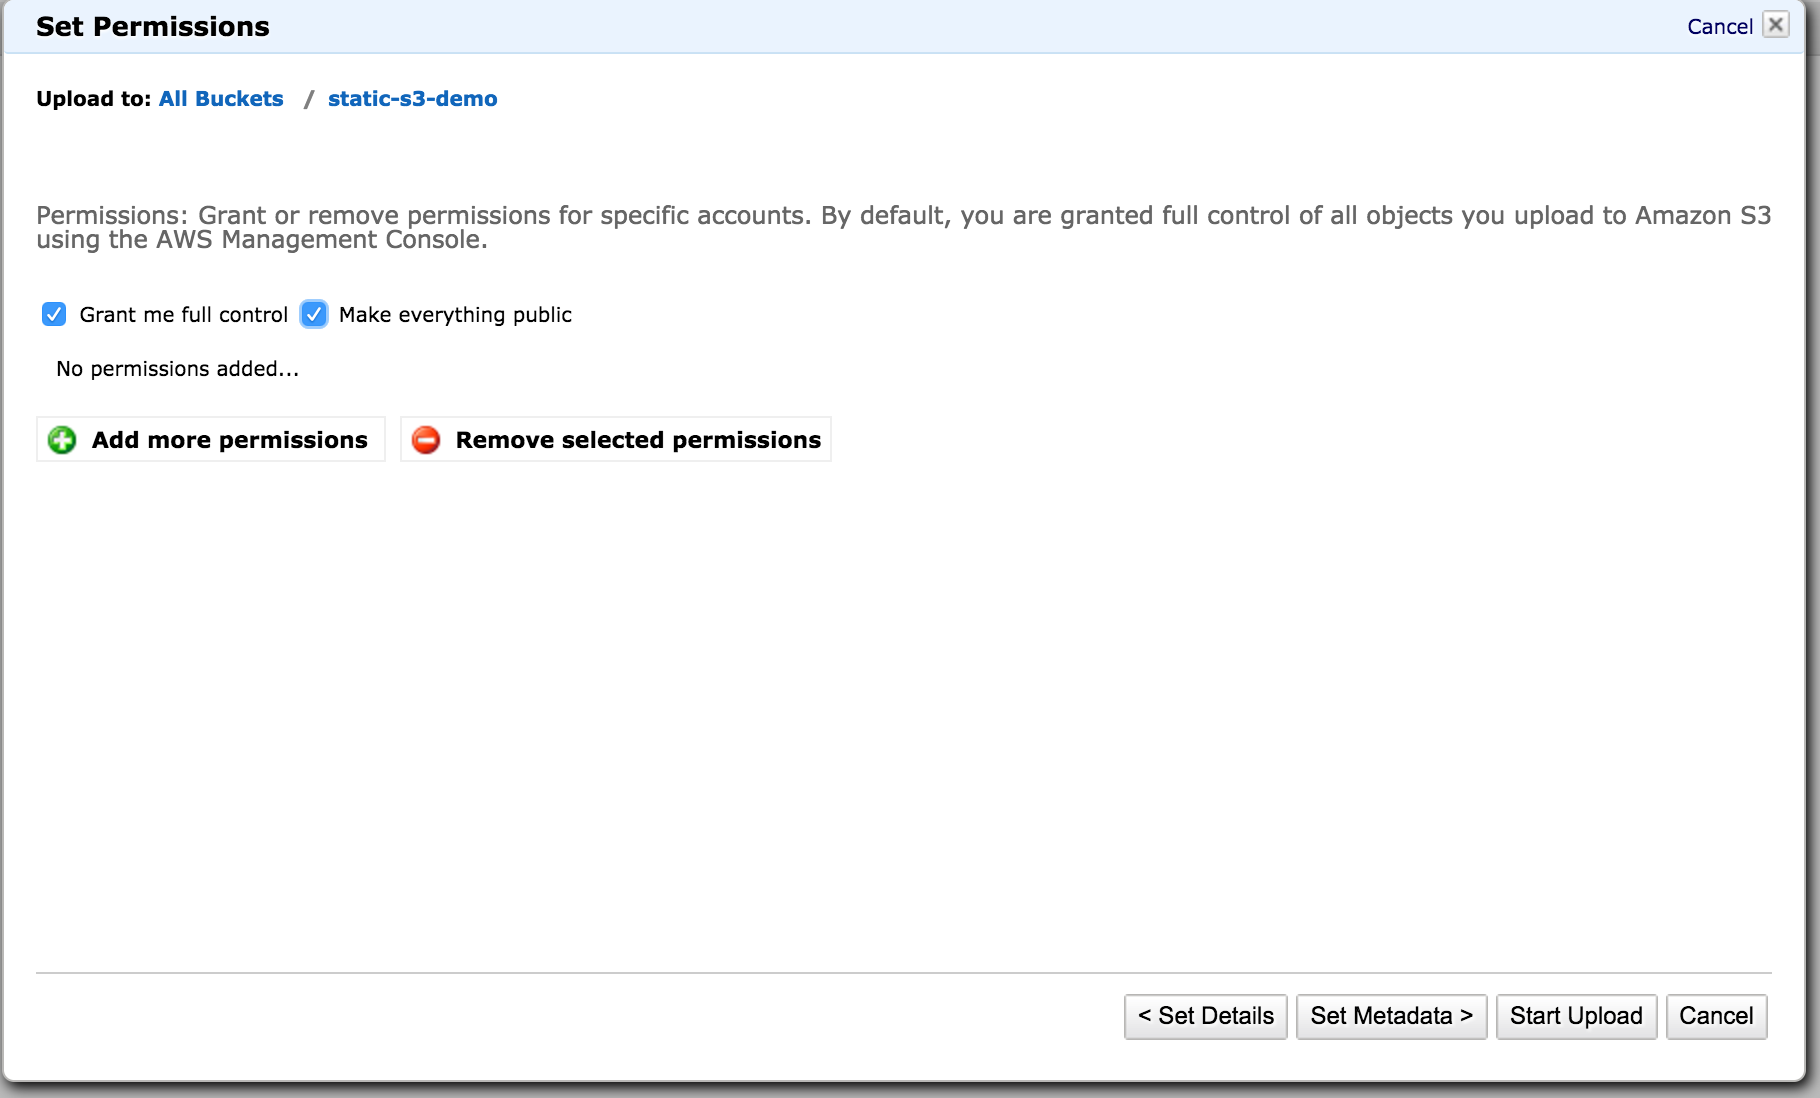
We need to edit the details for the files... You can use Standard Storage.
Then click "Set Permissions" and make everything public as this content needs to be viewable by the general public.
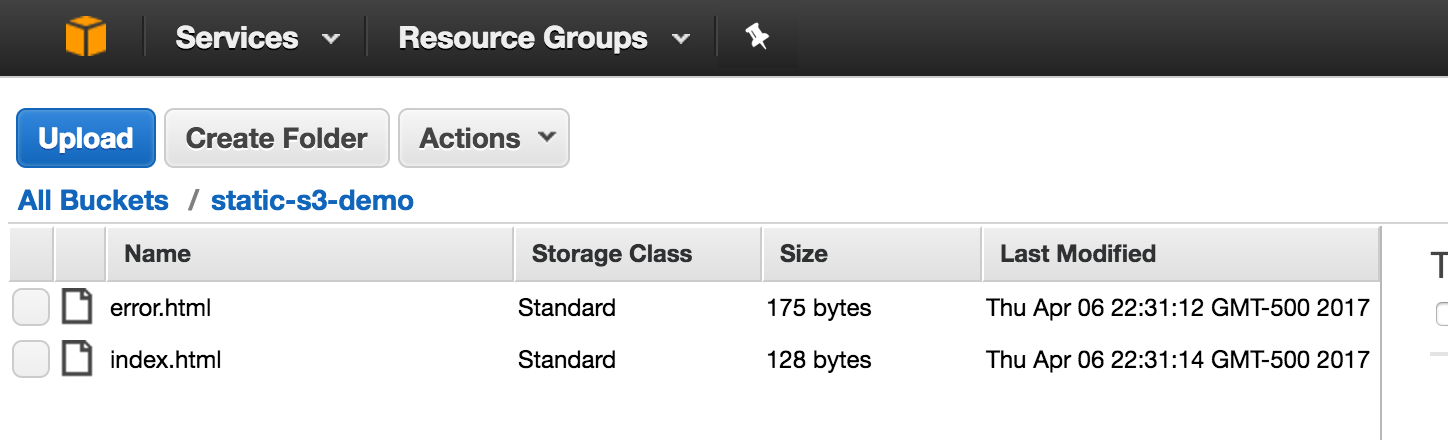
Now you can "Start Upload" and you should see them in your S3 bucket like so.
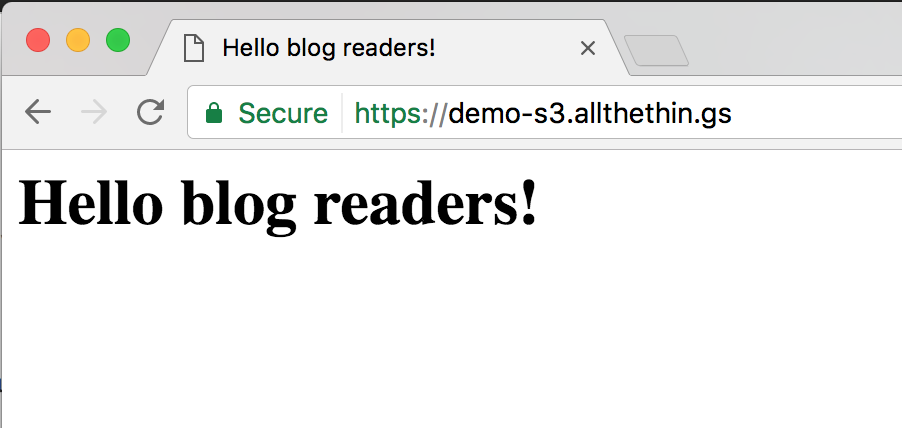
Now if we kept track of the "Endpoint" url listed earlier for the S3 bucket's HTTP endpoint we could try to browse to it in our web browser and we should see the index.html document served up by default:
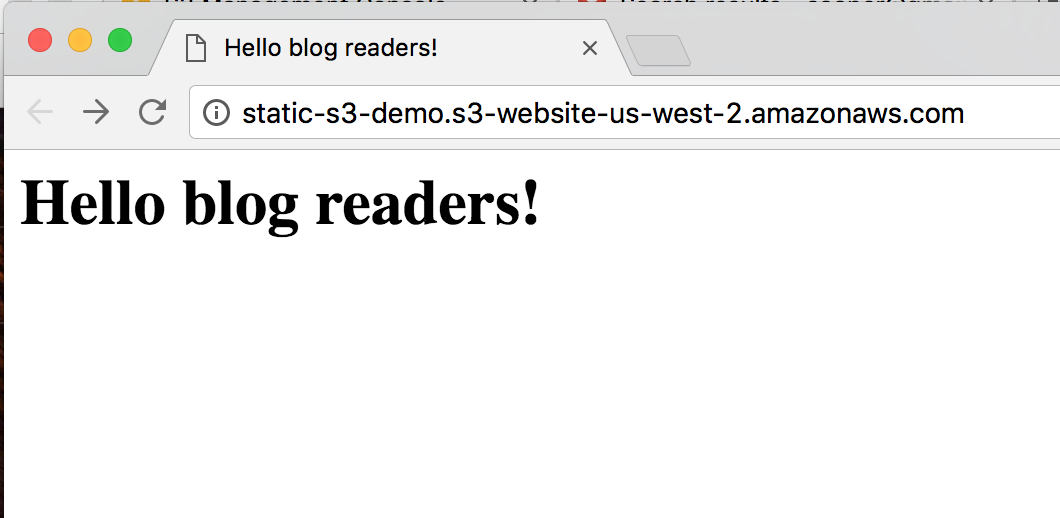
(index.html document)
Also if we try to access a non-existent page or item, we should get the error document:
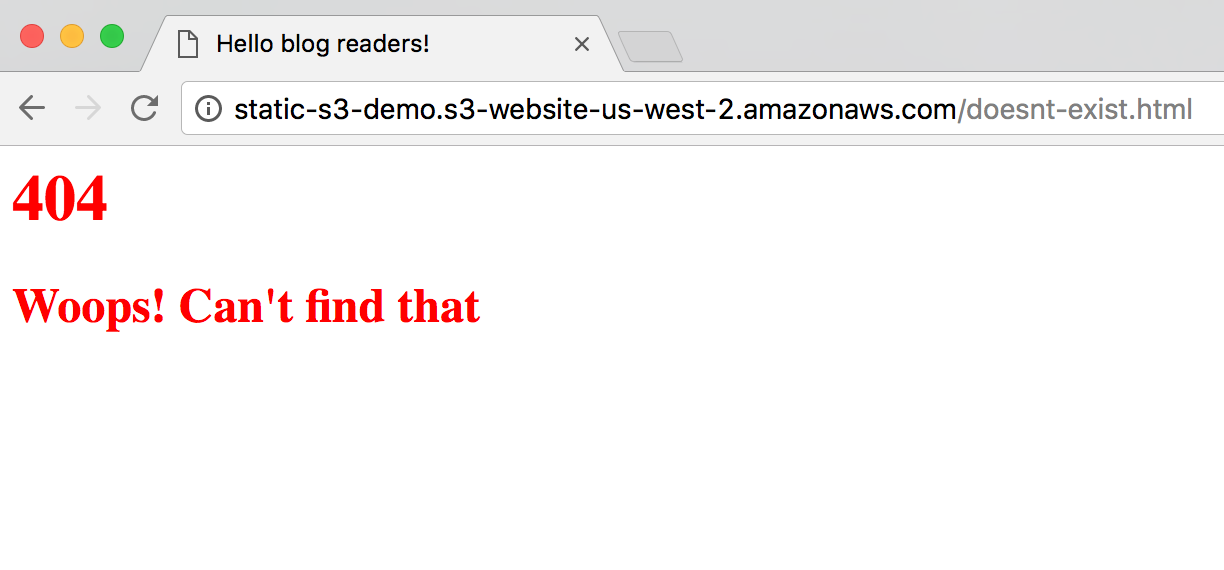 (error document)
Step 2 - Request an Amazon certificate using AWS Certificate Manager
Since we are going to be hosting an SSL enabled website. We are going to need an SSL certificate. Lucky for us we can use an ACM (AWS Certificate Manager) cert for free. The main thing to note with these certificates is you can only use them in the AWS integrated services. You cannot export them for use on your random web server of choice.
Our next step will be to request one. Type the DNS name that you are going to use. Note: you must own this domain name and have access to not only create your DNS record, but also to the domain administration email account(s).
The basic ACM process goes like this.
- Enter the DNS name you want the certificate for
- Request the certificate. This sends an email to the domain admin accounts.
- Check your email. There will be an email from AWS to click to validate the cert request.
- Now the cert should be live and you can use it at AWS.
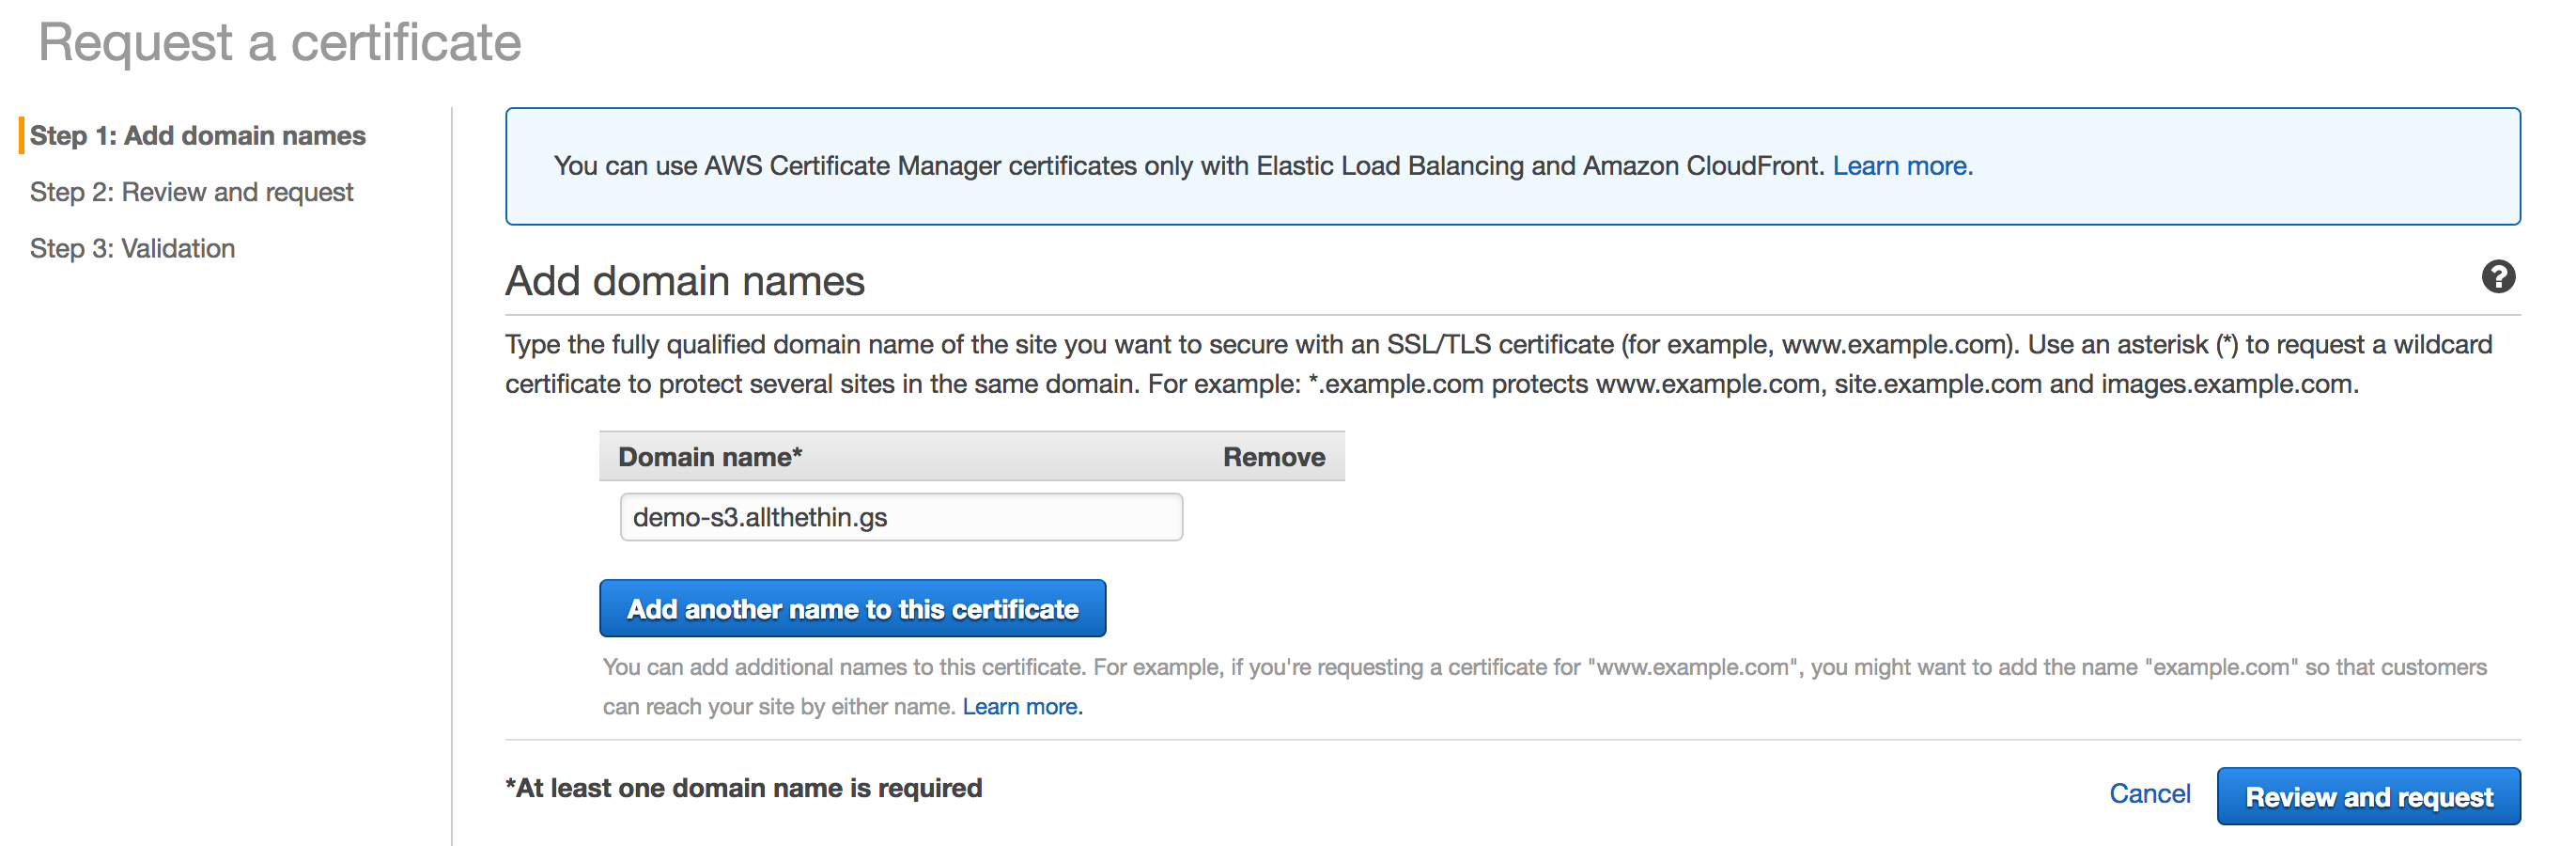 (enter the DNS name you want the certificate for)
Click "Review and request" and then if everything looks good "Confirm and request"
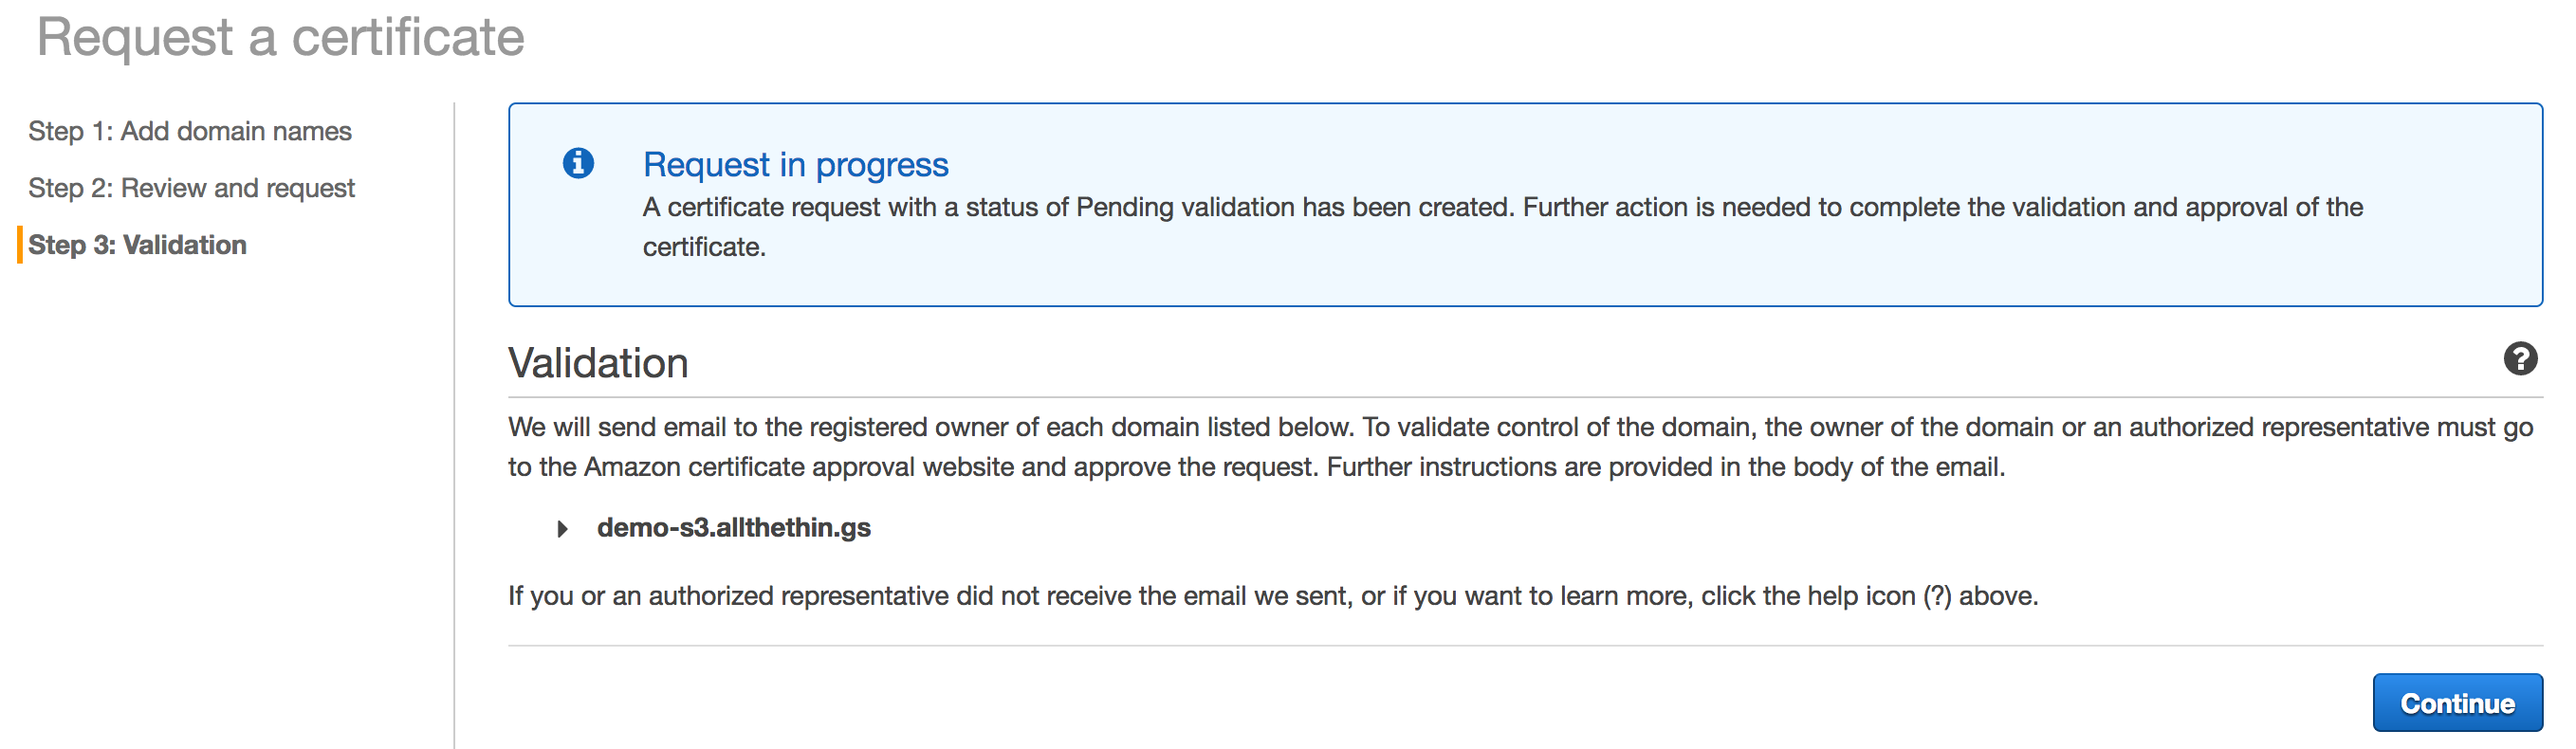
(validation in progress...)
At this point you will need to check your email for the AWS ACM confirmation message and follow the link to confirm you really requested the certificate.
When you have done that it should show in your AWS console that it has been issued.

Step 3 - Create an AWS CloudFront distribution with an Origin of the S3 bucket
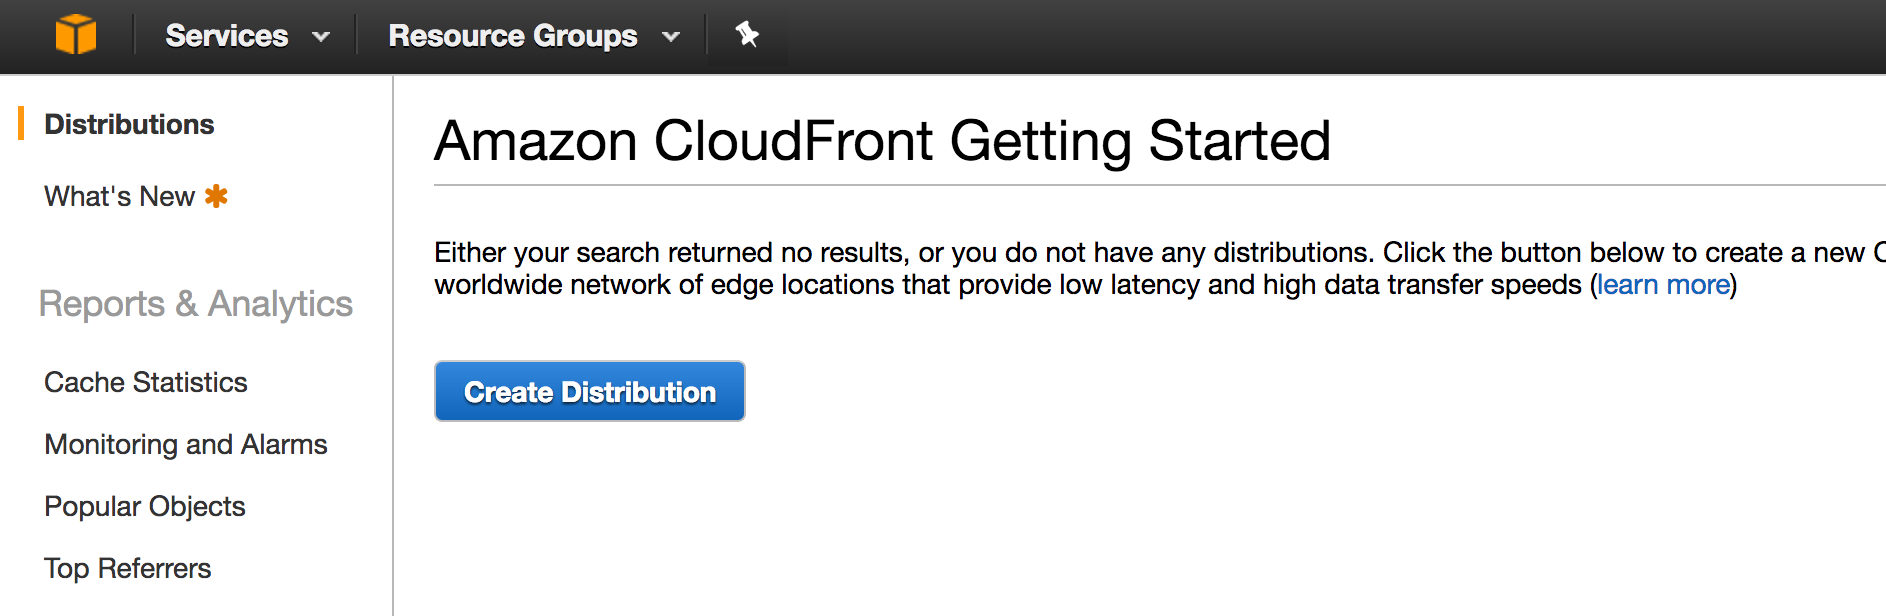
Now we are ready to go on to the CloudFront distribution. Start off by navigating in the AWS console to CloudFront and click "Create Distribution."
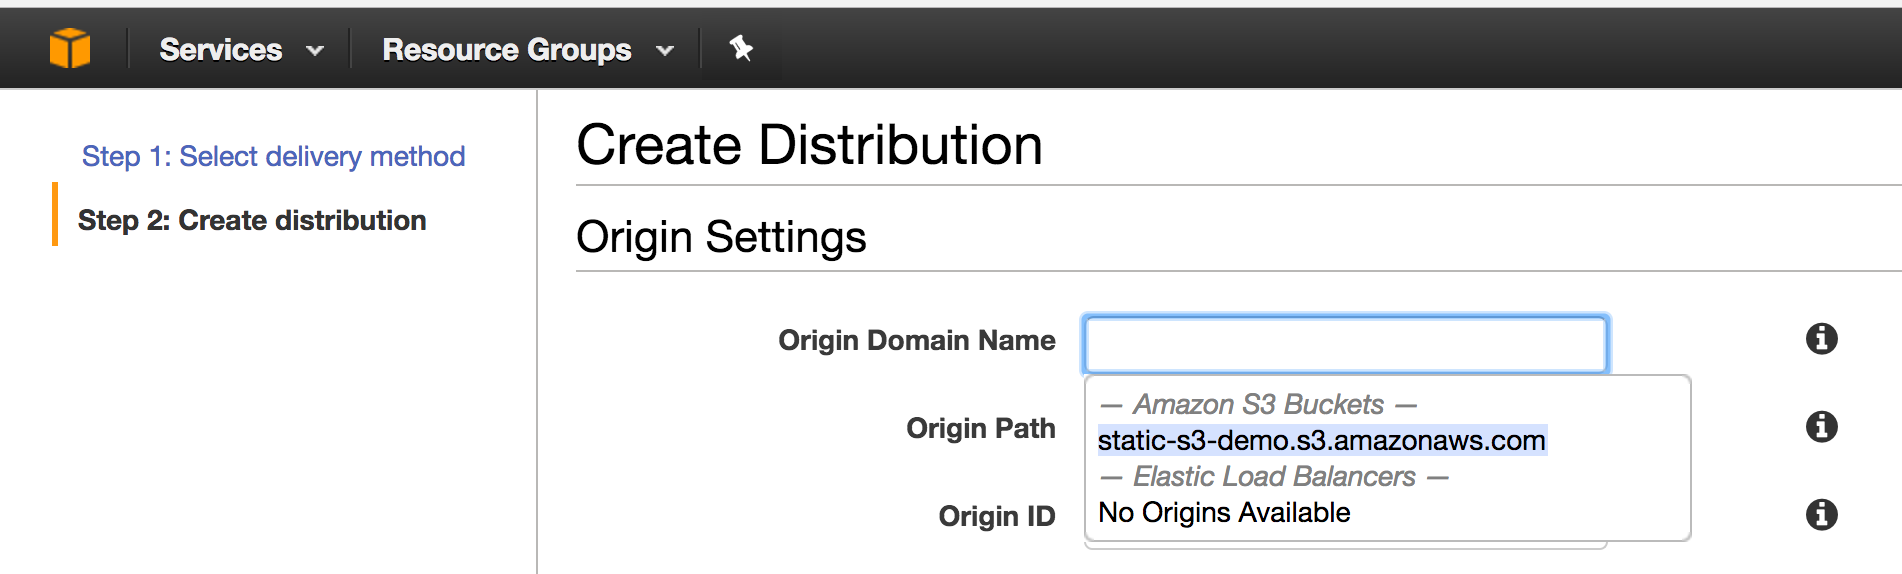
We want to create a "Web distribution" so choose that... then under Origin Name you should get a dropdown showing your S3 buckets. Choose the one you just created for the S3 web hosting.
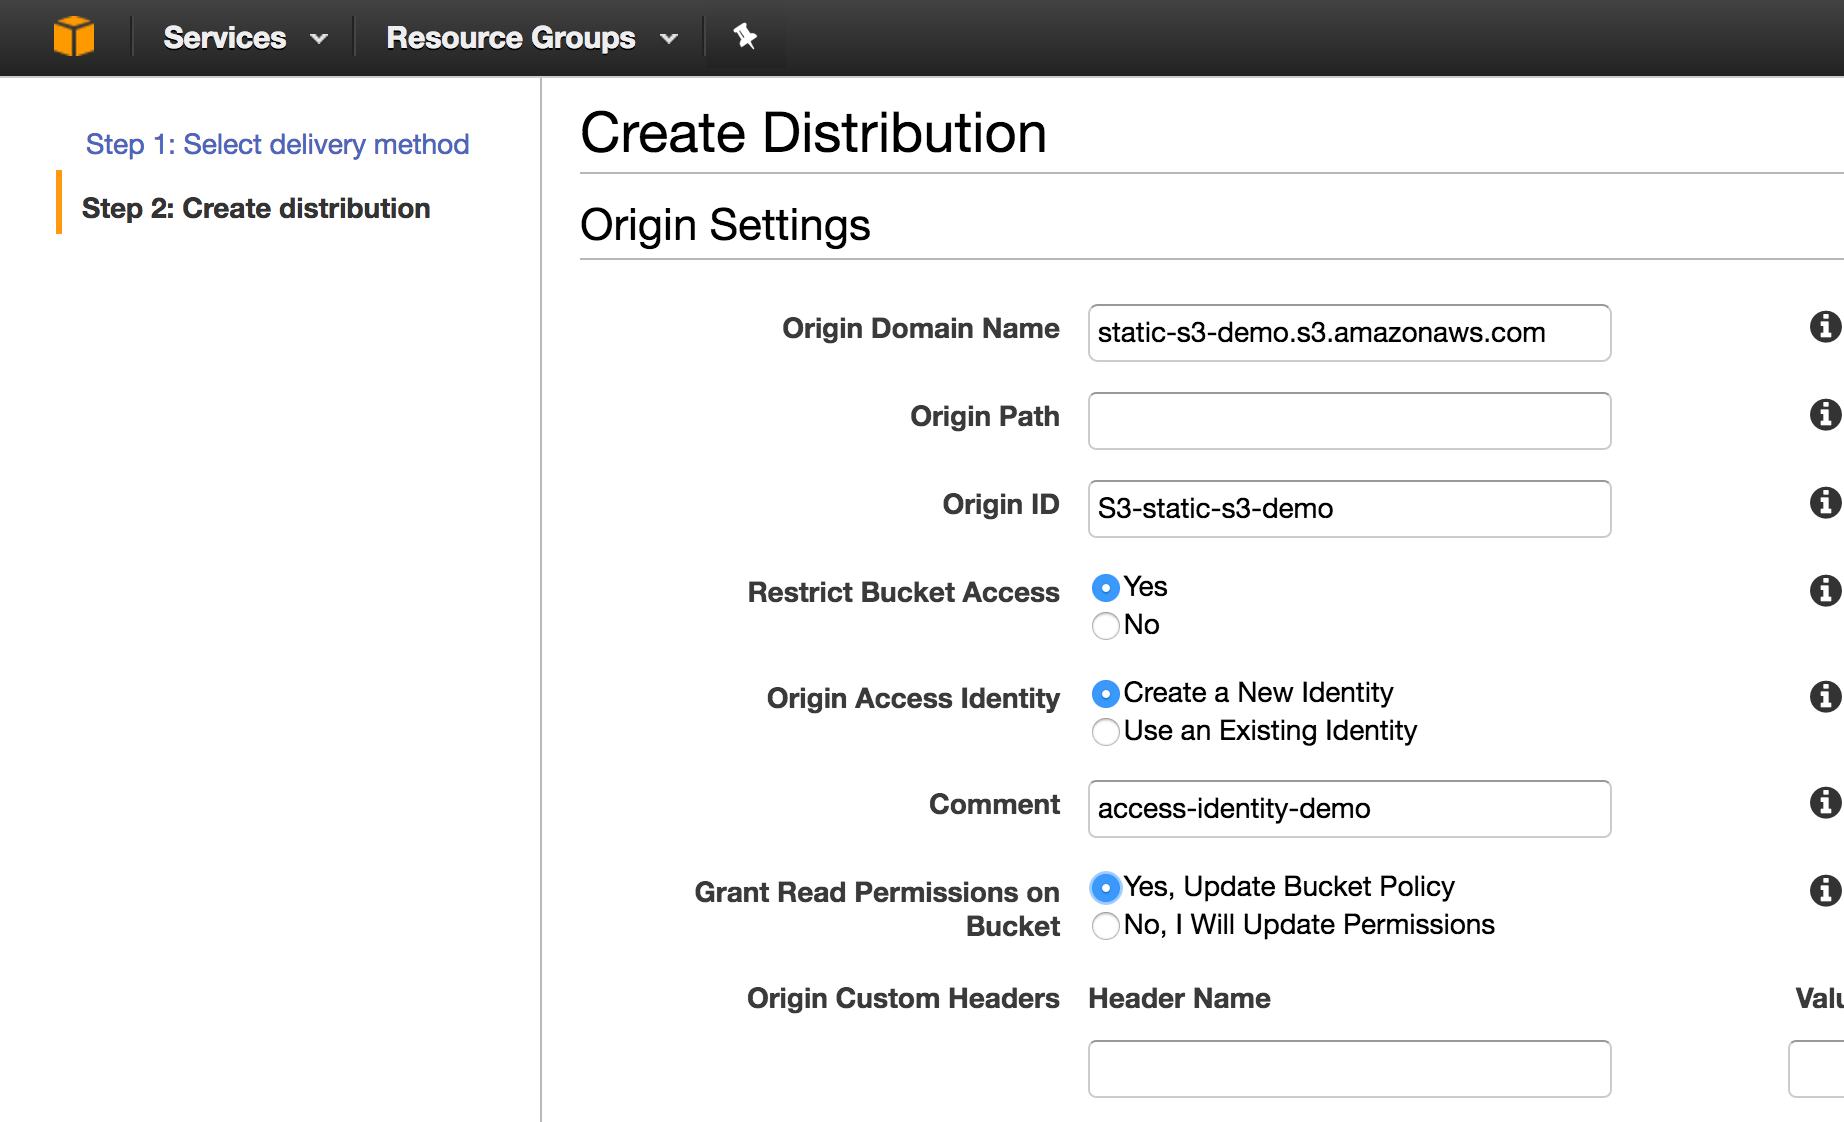
Next if you would like to change your bucket policy to only allow requests from CloudFront you can Choose
"Yes" under Restrict Bucket Access.
"Create a New Identity" under Origin Access Identity
"name it" where it says Comment ... and choose
"Yes, Update Bucket Policy"
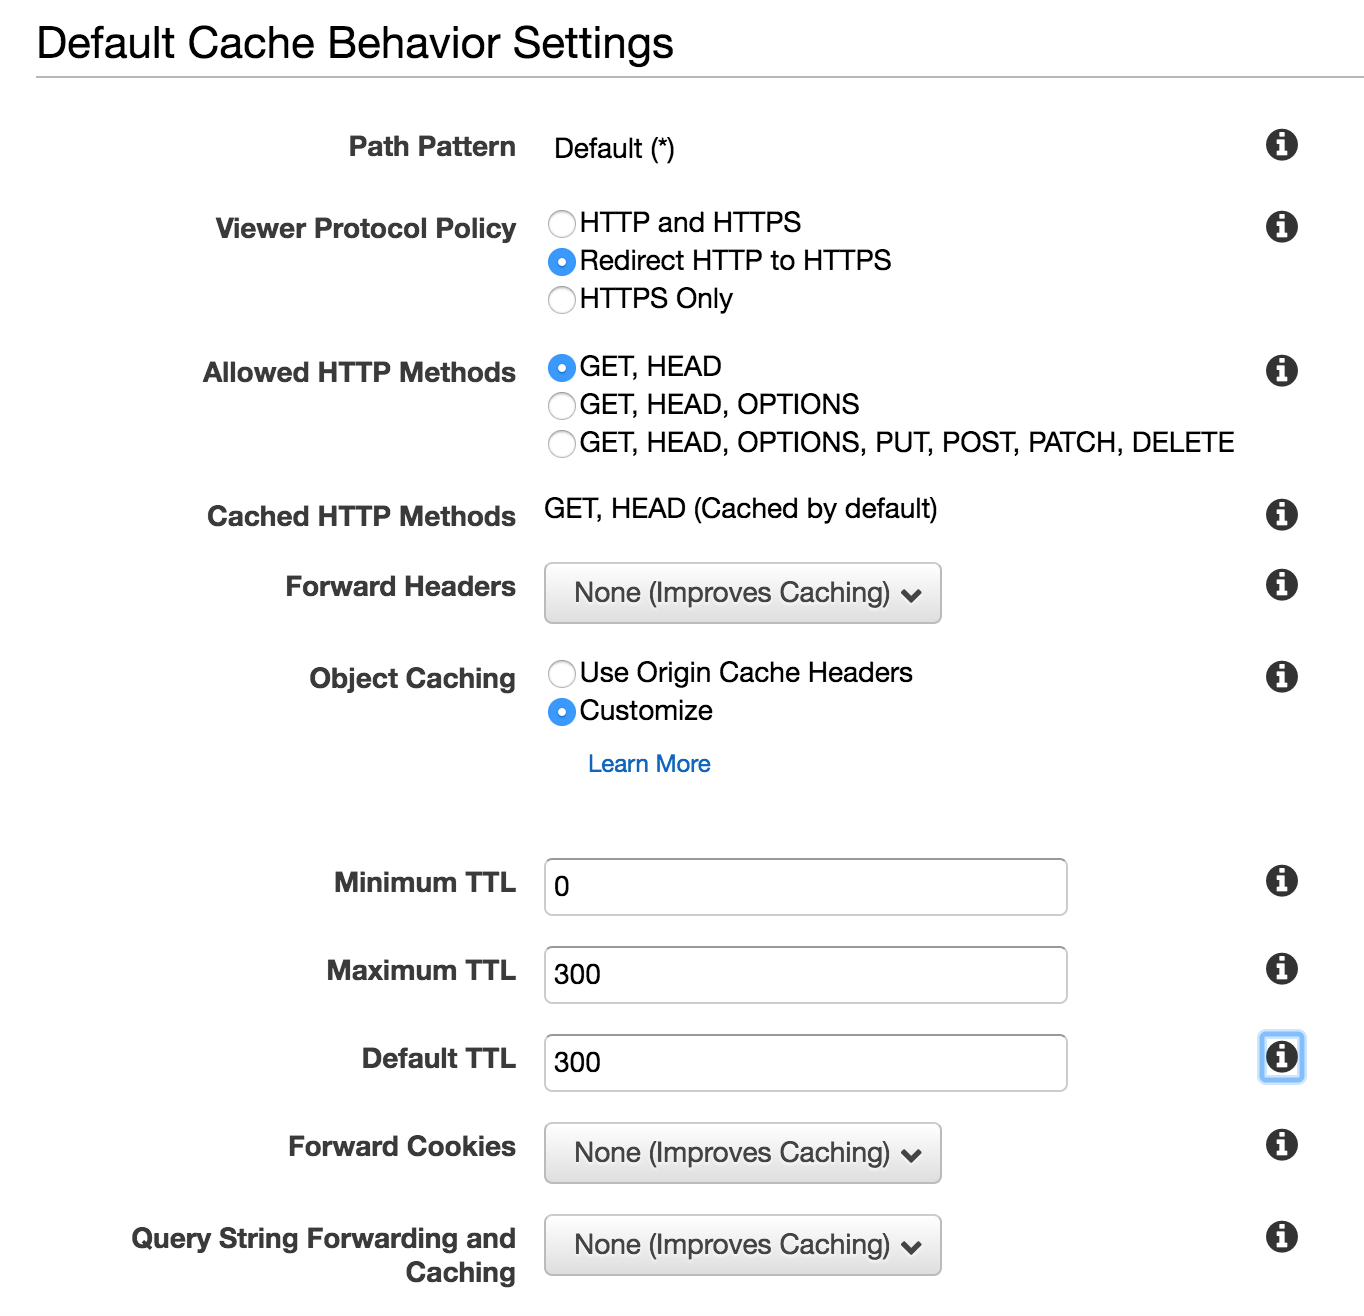
You can also choose to redirect any HTTP requests to HTTPS as well as change the cache TTL settings depending on how frequently you would like CloudFront to query the Origin for content changes.
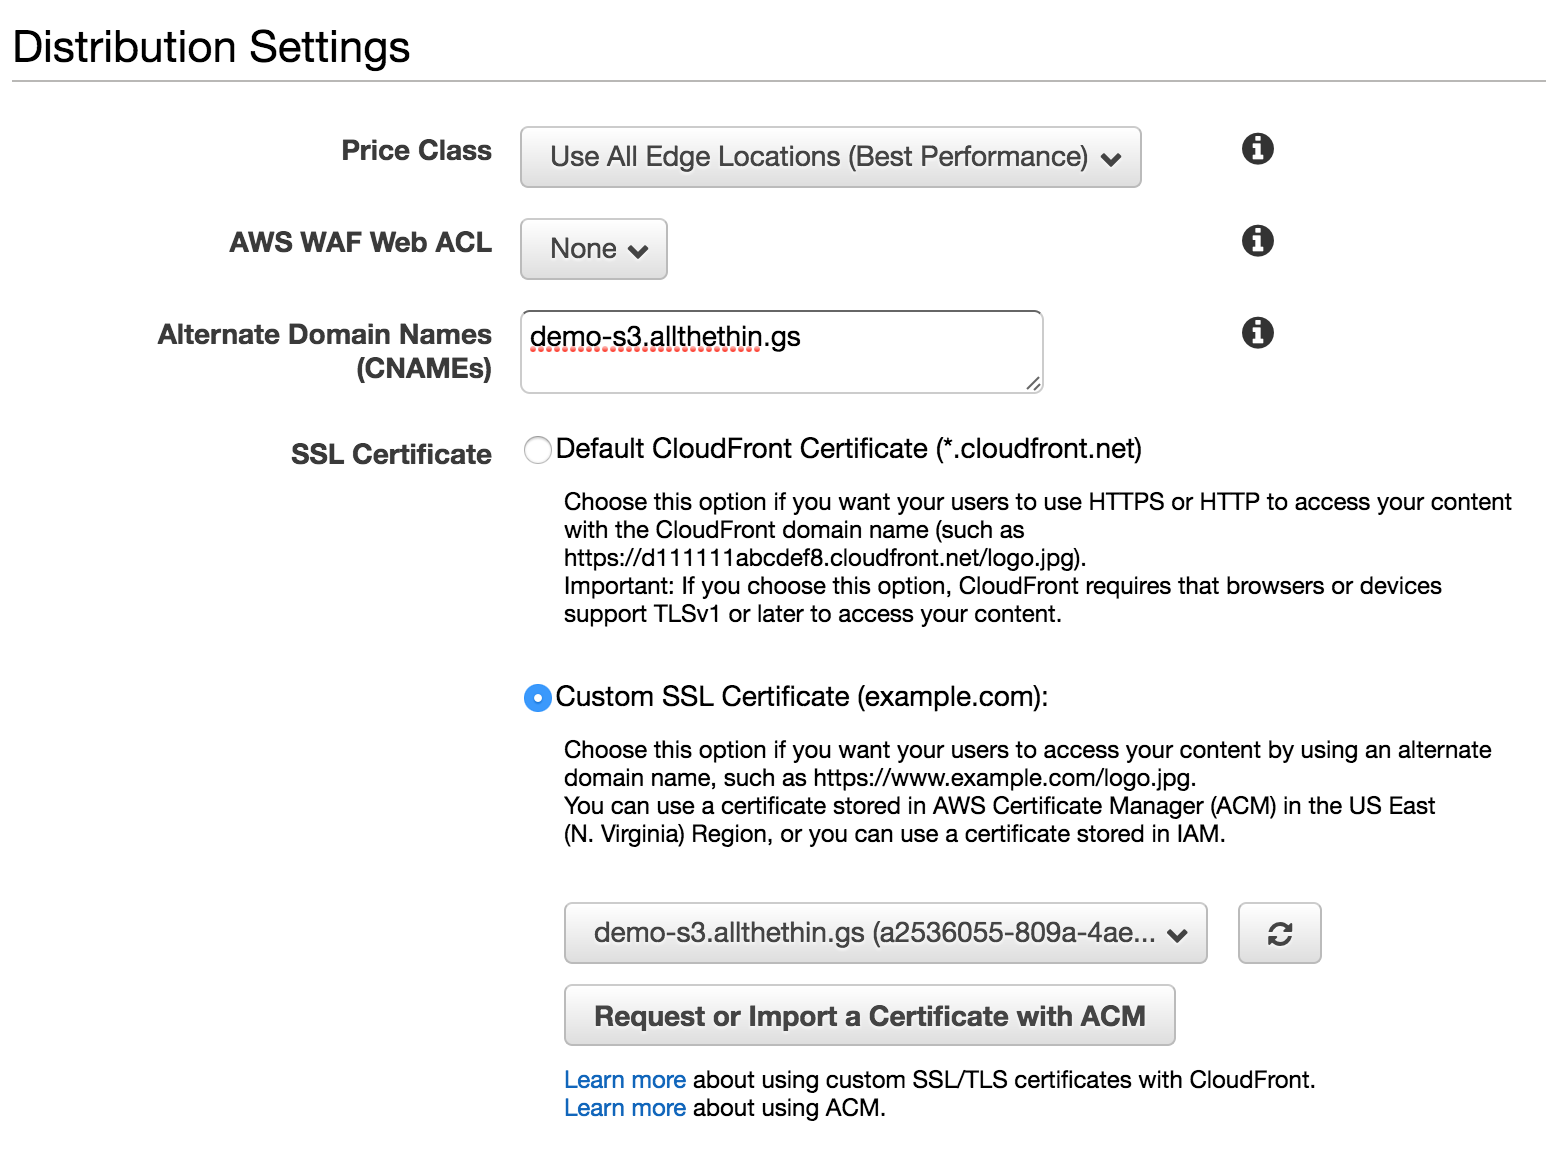
Then we need to set the DNS name we are using for this website under the "Alternate Domain Names (CNAMES)" settings and here we can also choose to use our "Custom SSL Certificate".
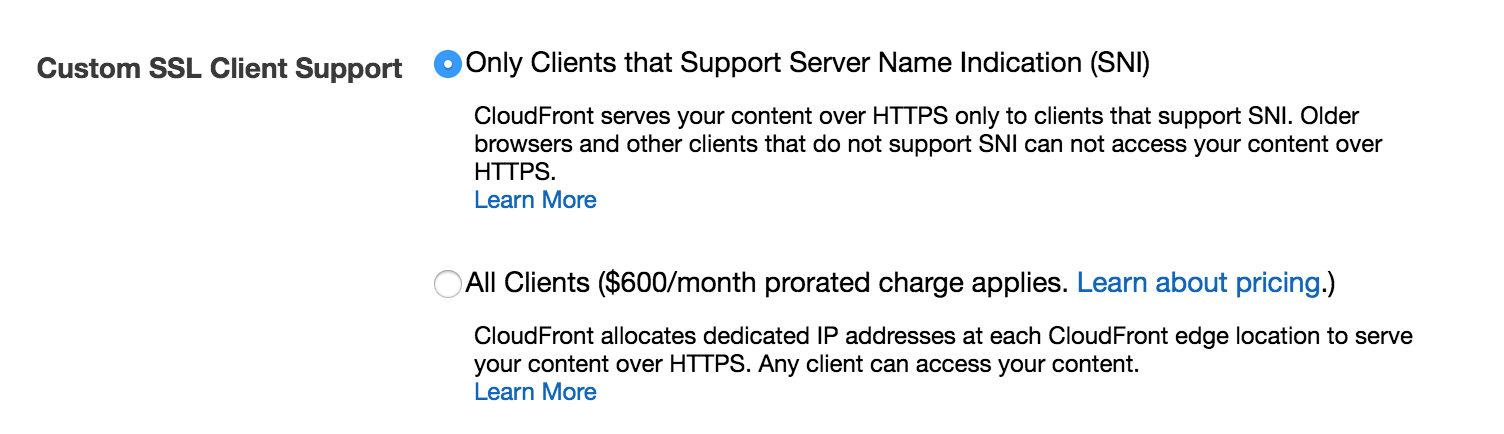
We are going to select "Only clients that support SNI" as it's a more modern mechanism for SSL and it's a much more cost effective option. I haven't seen any browsers not support this so don't worry that you are not choosing the "All Clients" option.
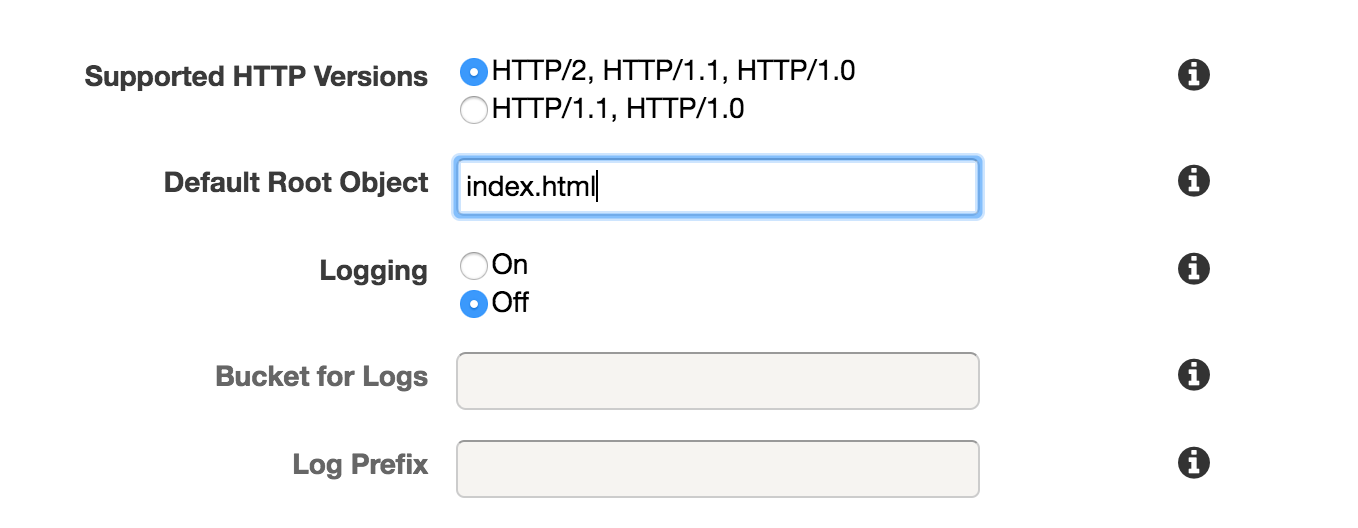
Do NOT forget to choose the default index document here as well
Now you can click "Create Distribution"
Your shiney new CloudFront distribution will show up now, but it will take in my experience 20~40minutes to complete the distribution. So at this point you could go do something else like have a piece of pie and coffee or something...

NOTE THE "Domain Name" listed here. You will need this in the final step to point your DNS entry at.
Step 4 - Configure your DNS to point to the CloudFront distribution
If you are not using Route 53 for your DNS, what you need to do is get into your DNS console and create a CNAME record for whatever website DNS name you chose to point to the "Domain Name" listed above that ends in ".cloudfront.net".
Assuming you are using Route 53 for your DNS you just need to create a record set.
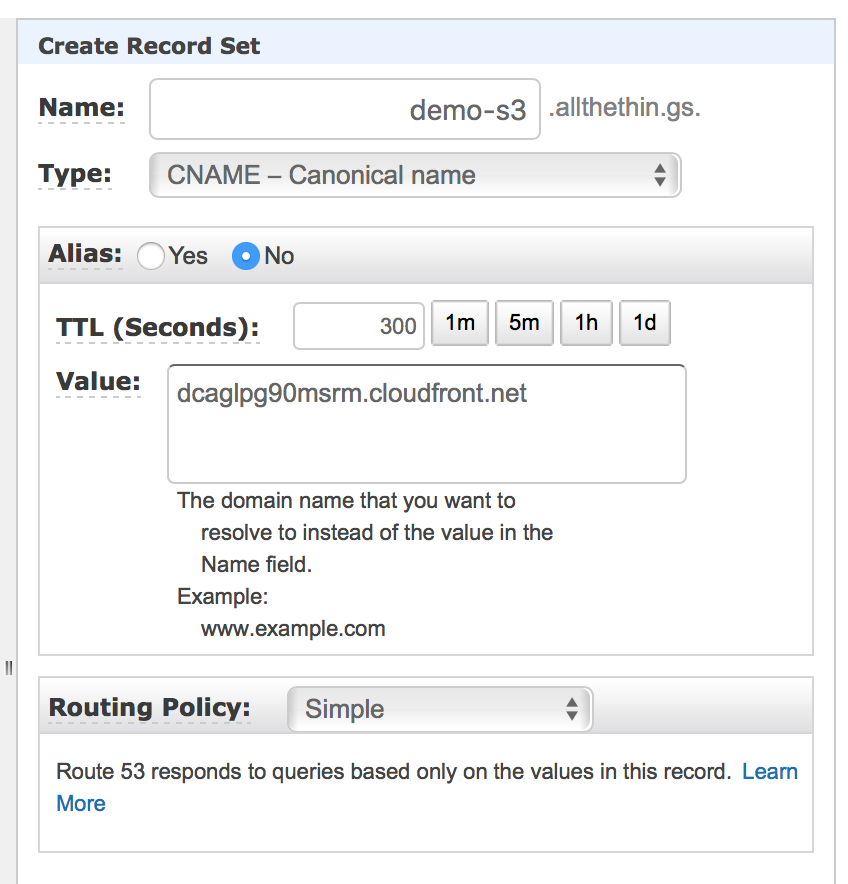
(demo-s3.allthethin.gs will point to the CloudFront distribution's DNS name)
And finally choose "Create Record Set". You will have to wait for your DNS entry to propagate and assuming you did that and your CloudFront distribution has finished distributing around the globe you can try to navigate to your website:
https://demo-s3.allthethin.gs